Introduction
Hi there! Recently, I’ve spent a lot of time testing various WordPress configurations on Coolify, and I decided to write an easy-to-follow technical guide so you don’t have to go through the same trial and error I did. So if you want to learn how to properly install WordPress on Coolify, you’re in the right place! 😁
Overview of Coolify and its capabilities
Coolify is an open-source platform that simplifies the deployment and management of applications, databases, and other services. Designed with developers in mind, it provides an intuitive web interface and support for containerized applications through Docker. Whether you’re hosting a static website, deploying a complex backend, or setting up a full-stack application, Coolify streamlines the process by eliminating much of the manual configuration.
What you’ll achieve by the end of this guide
By the end of this guide, you’ll have a fully functional WordPress website connected to a separate MySQL database, all deployed on Coolify. You’ll also learn how to secure your site with HTTPS, access WordPress files, and manage your database. This setup will not only be robust but also easy to maintain and extend as your needs grow. 😁
But you could say, “Wait a minute… Coolify already has a ‘WordPress’ resource, so what’s there to talk about?”
Yes, it does — but we’re going to do it better, and I’ll tell you why in a moment.
Why set up WordPress and MySQL as separate resources?
While Coolify provides a convenient “WordPress with MySQL” resource, we’ll take a different approach by creating two separate resources: one for WordPress and another for MySQL. This method offers several key advantages.
Firstly, separating services is simply a good practice in modern deployments. For instance, you can independently upgrade or maintain the database without impacting your WordPress instance, and vice versa. Additionaly you can set up multiple wordpress sites with single database instance.
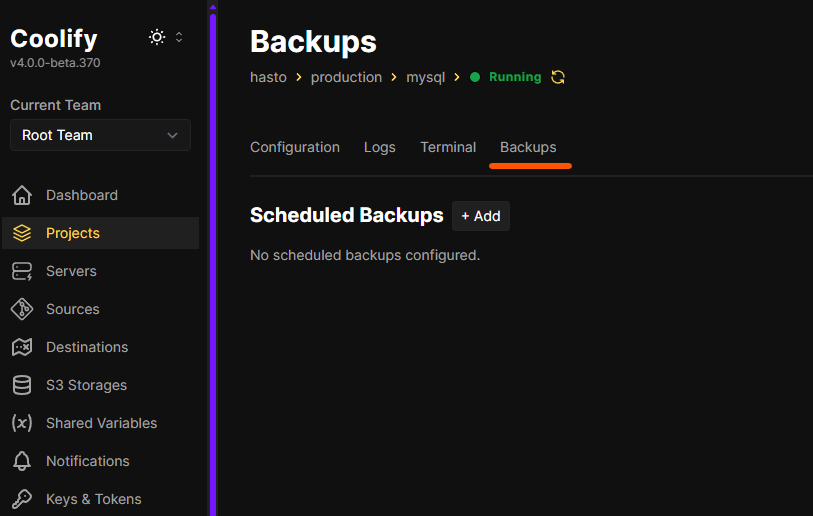
Secondly, by choosing a standalone MySQL resource, you unlock additional features provided by Coolify, such as automatic backups, which are not available when using the combined “WordPress with MySQL” resource. These backups are crucial for maintaining data integrity and peace of mind in case of unexpected issues.
And thirdly, we can easily migrate our WordPress backend to other engines without it affecting our database! (yes, an article about LiteSpeed is coming)
Setting Up WordPress and MySQL Resources
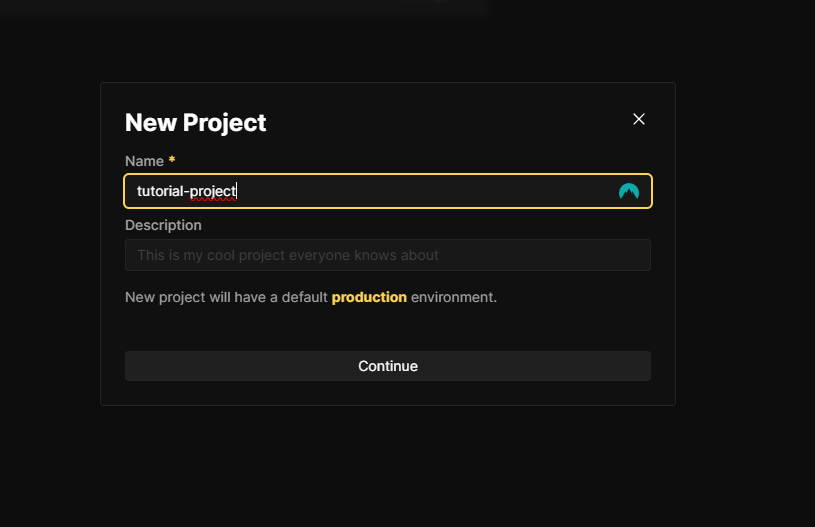
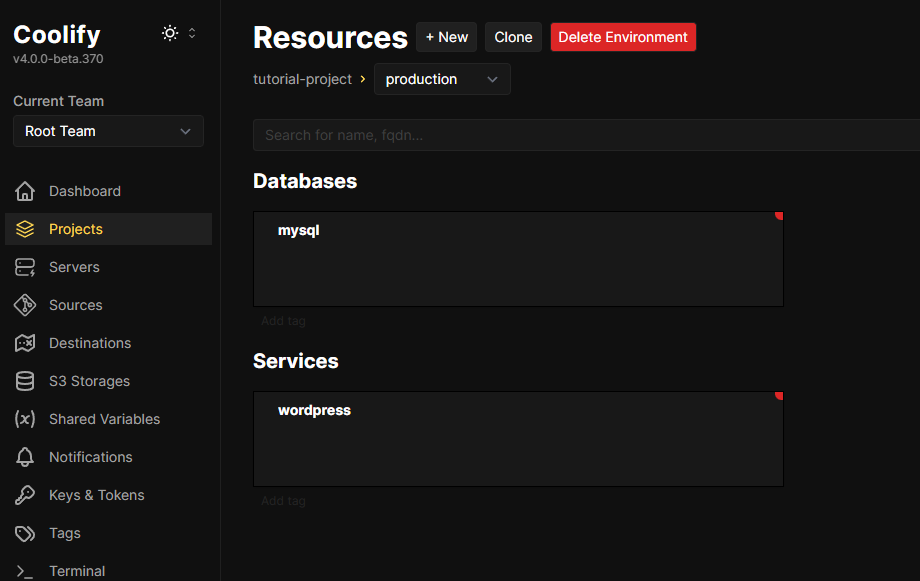
Let’s start by creating a new project. I named mine “tutorial-project.”
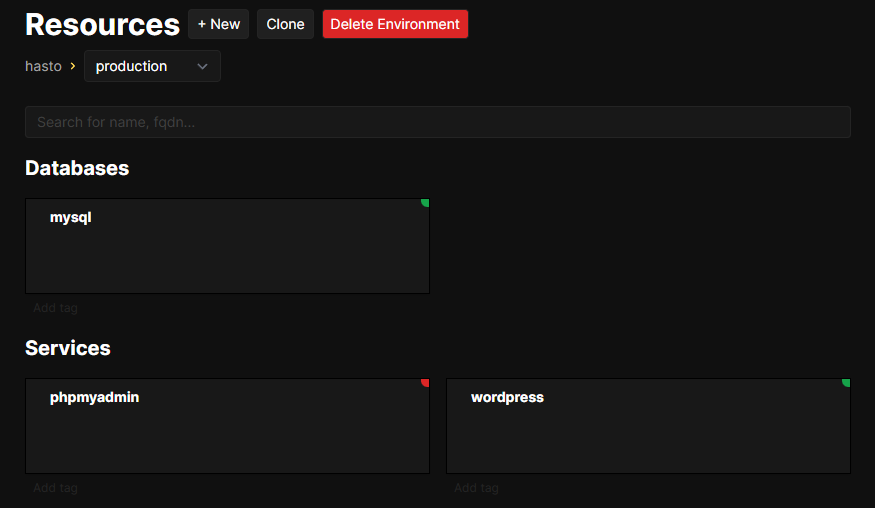
Next, let’s add two resources: “WordPress Without Database” and “MySQL“
After creating them, it’s a good idea to rename the default names to something more user-friendly.
We’ll do this by modifying the “Name” or “Service Name” fields by clicking on the respective resources.
TIP1: If you want to have access to your files from the VPS server level (where Coolify is located), you can map WordPress files.
To do this, in Coolify click on “Configuration” -> “General” and after clicking on “Edit compose file” set for example:
    volumes:
- '/var/wordpress-sites/website.com:/var/www/html'Don’t forget to create directory for wordpress files via
mkdir -p /var/wordpress-sites/website.com
This is the location where WordPress files will be “mapped”.
Now we can run both resources, so open both of them and click “Start” or “Deploy“. 🛫
TIP2: When both resources turn green, you’ll be able to view the newly created Docker containers using the command:
docker container ls --format "table {{.ID}}\t{{.Image}}\t{{.Status}}\t{{.Names}}"In the attached screenshot, you can easily identify the two new containers for WordPress and MySQL. 🐬
Configuring resources
Now you’re probably expecting that we’ll simply launch the WordPress installer and get our site running. You’re partly right, but first, we need to connect our resources to the same network. 🛜
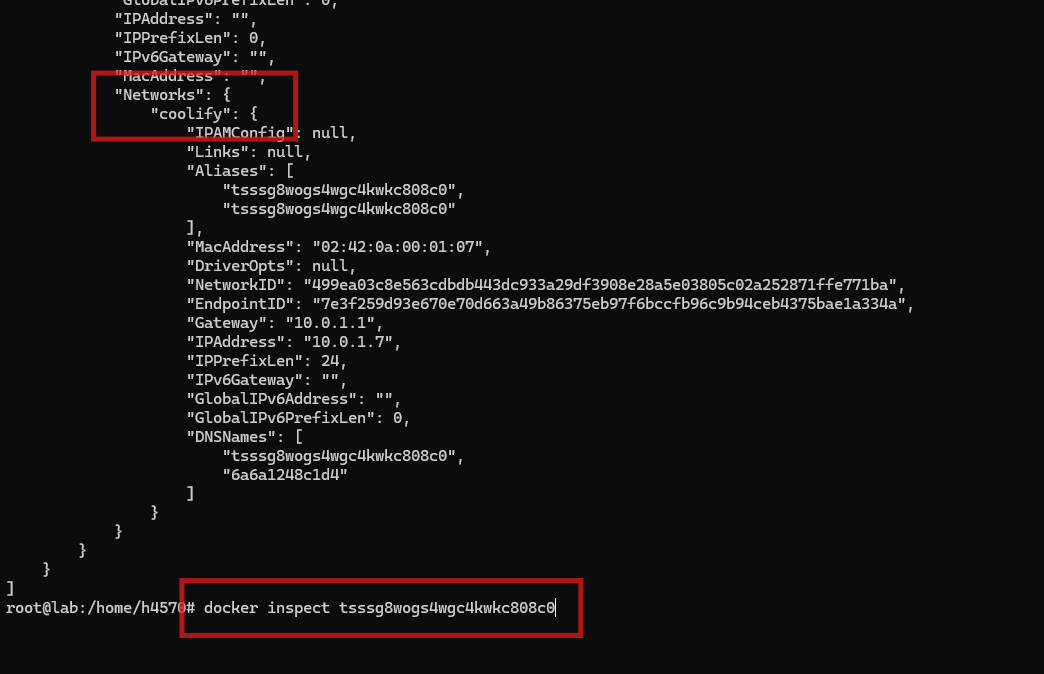
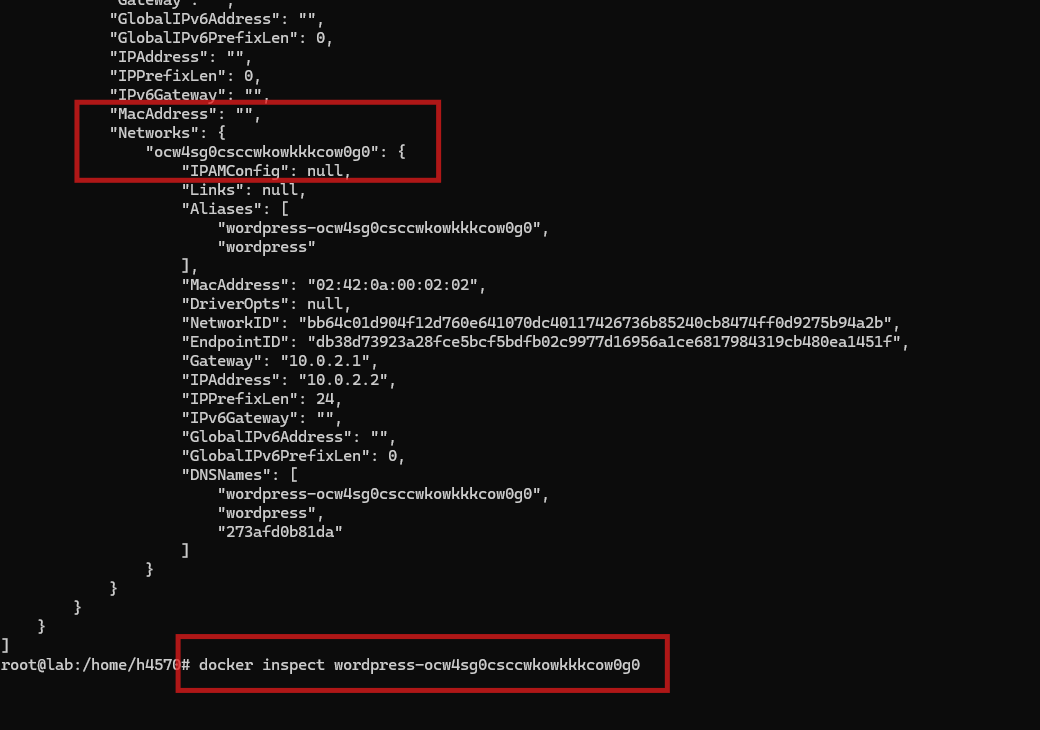
To explain this better, let’s inspect our new containers using the docker inspect command on our Coolify server. We’ll notice that in the “Networks” section, there isn’t a single network with the same name for both containers. 📦
This means the containers cannot “see” each other on the network, making it impossible for the WordPress container to use the MySQL database from the MySQL container.
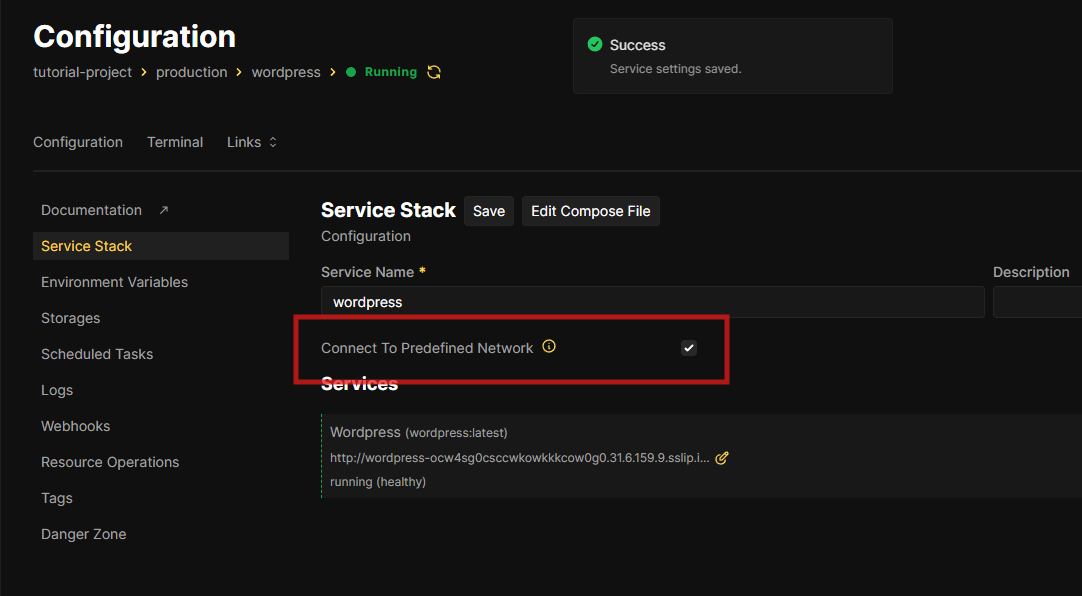
We will fix it by ticking “Connect to predefined Network” and “Restart” in our WordPress resource. 🔁
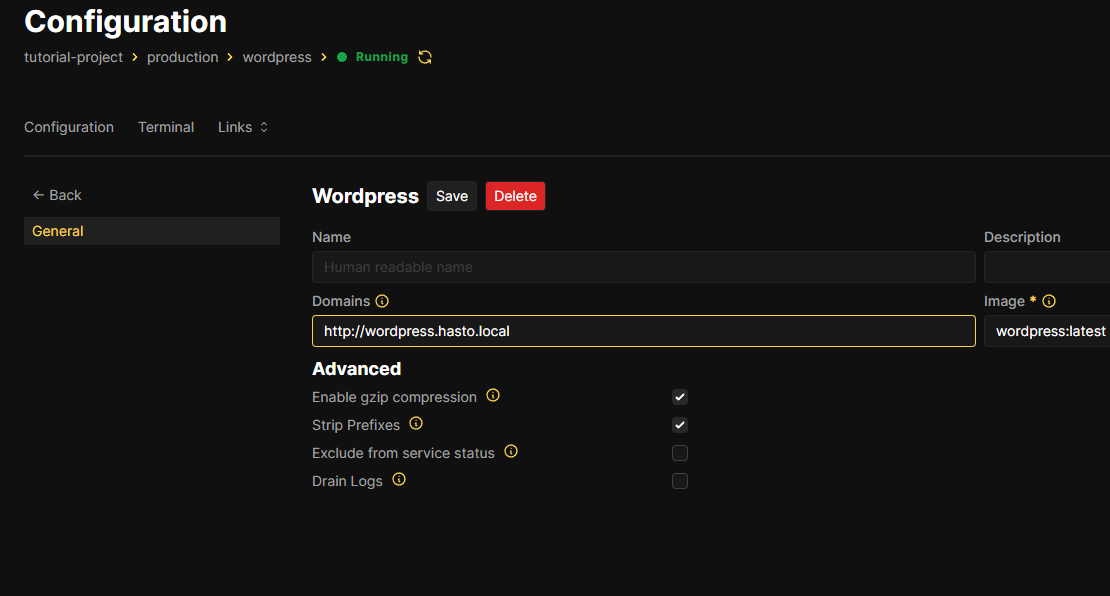
Let’s configure the domain for our WordPress website. Open the WordPress resource, then click on “Settings” under the “Services” header.
If you have correctly set the A record in your domain’s DNS zone, you can now enter your domain in the “Domains” field, e.g., http://mywebsite.com,https://mywebsite.com. Coolify will automatically handle the redirections, and when it detects incoming traffic to any of these addresses, it will route it directly to your WordPress resource. 🛠️
(don’t forget to restart resource after saving) 🫡
In the last step, we need to create a new database for our WordPress instance and assign the appropriate permissions.
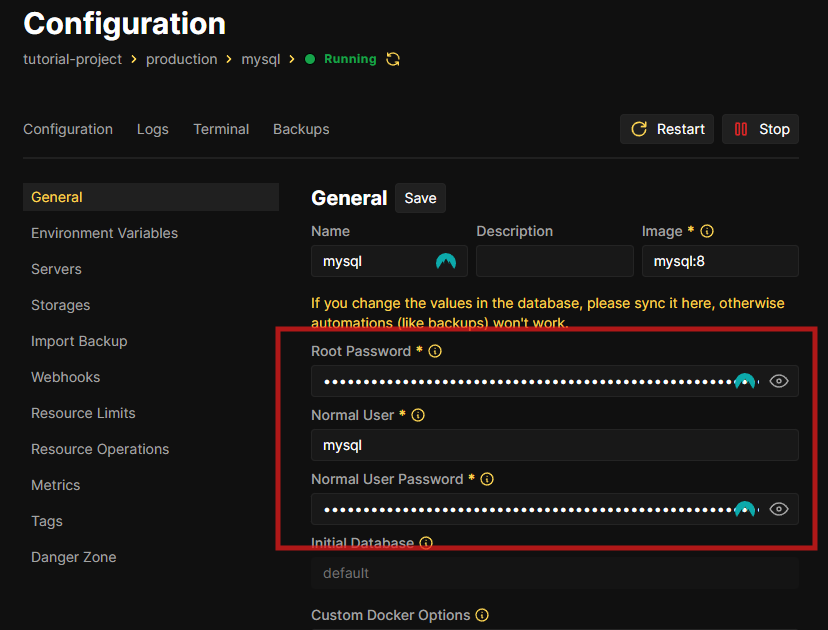
To do this, let’s open the MySQL resource on Coolify and take note of the “Root password”, “Normal user”, and “Normal user password” fields.
The “Normal user” will be the user we use for WordPress.
Let’s access the command line of our Coolify server and run the following commands:
docker exec -it <MYSQL_CONTAINER_NAME> mysql -uroot -p'<ROOT_PASSWORD>' -e "CREATE DATABASE wordpress;"

docker exec -it <MYSQL_CONTAINER_NAME> mysql -uroot -p'<ROOT_PASSWORD>' -e "GRANT ALL PRIVILEGES ON wordpress.* TO 'mysql'@'%'; FLUSH PRIVILEGES;"These commands will create a database named wordpress and grant the mysql user (Normal User) the necessary permissions to access it. 🔑
Now, finally we can begin with standard WordPress installation 😁
Installing WordPress
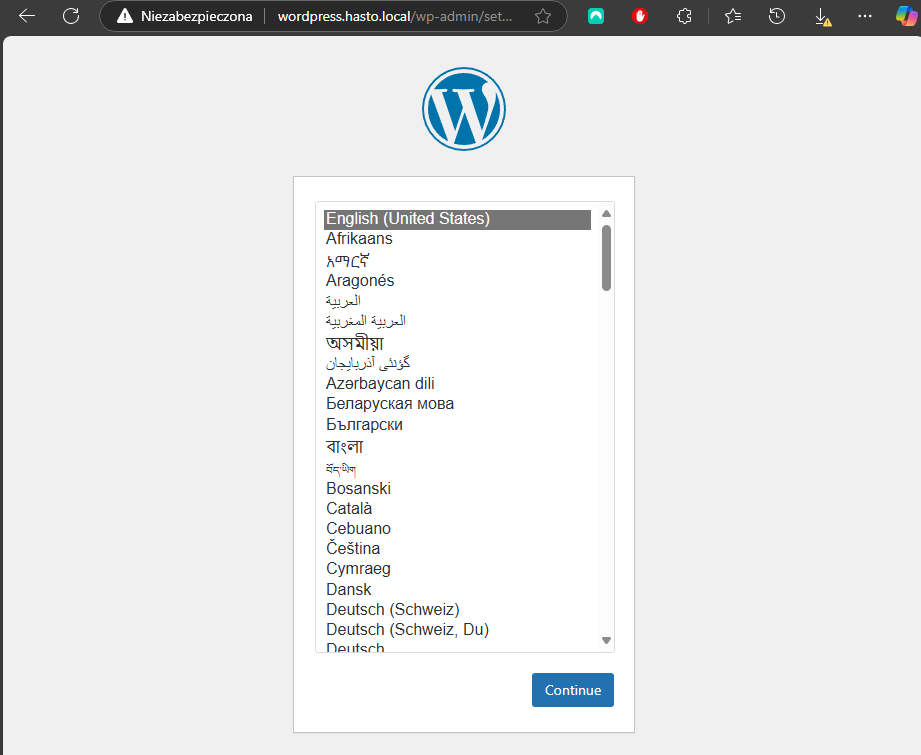
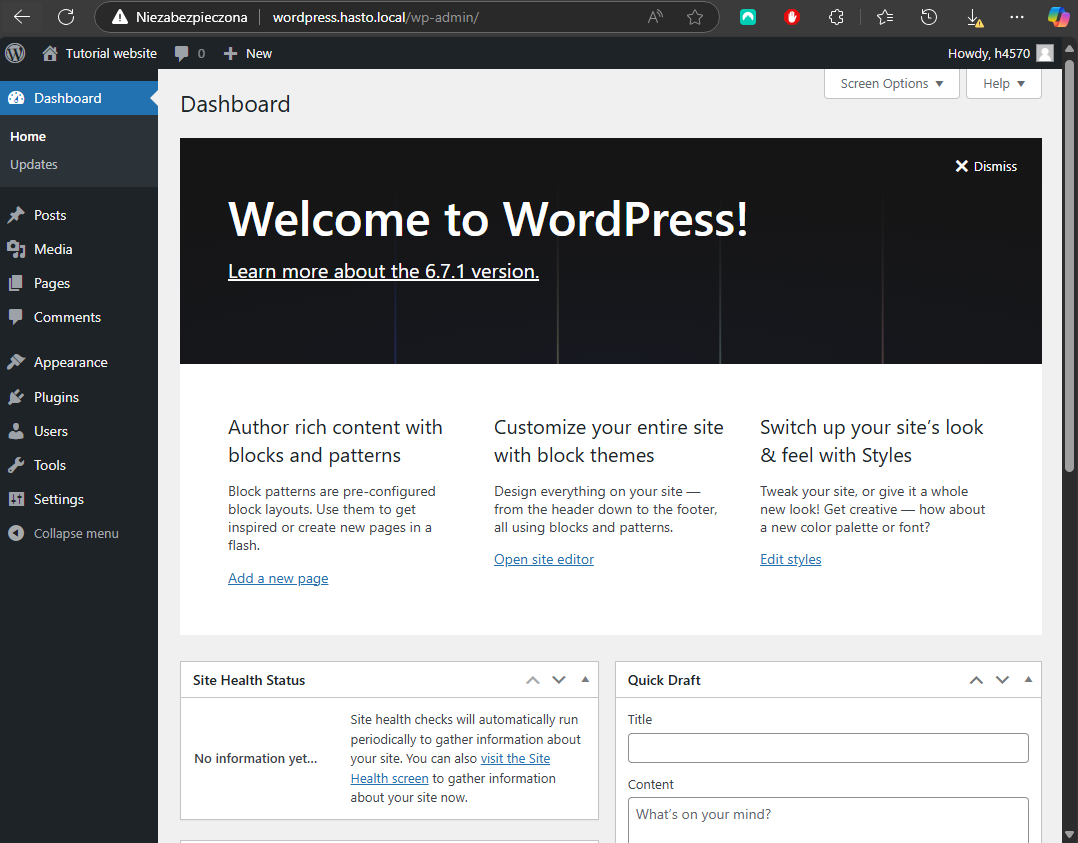
Open the domain you specified earlier in your browser, and you should see the WordPress installation welcome screen.
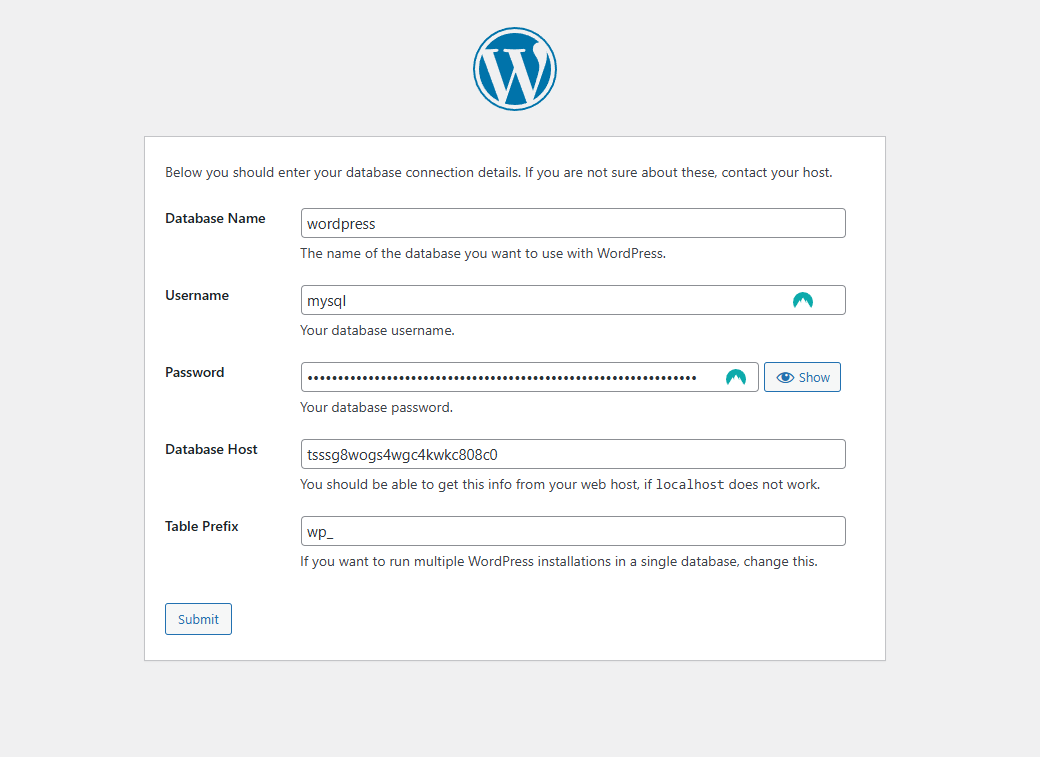
During the configuration process, enter mysql as the username, the appropriate password, and wordpress as the database name. The Database Host should be the name of your MySQL container.
And… here it is! 🚀
Free bonus content!
If you want to get my script for automatically patching such a Coolify server for free, sign up for my newsletter!
I wrote this script to make it quick and just one click away. After signing up, you’ll receive a link to the bonus section of my articles.
Thanks!
Configuring HTTPS for Secure Access
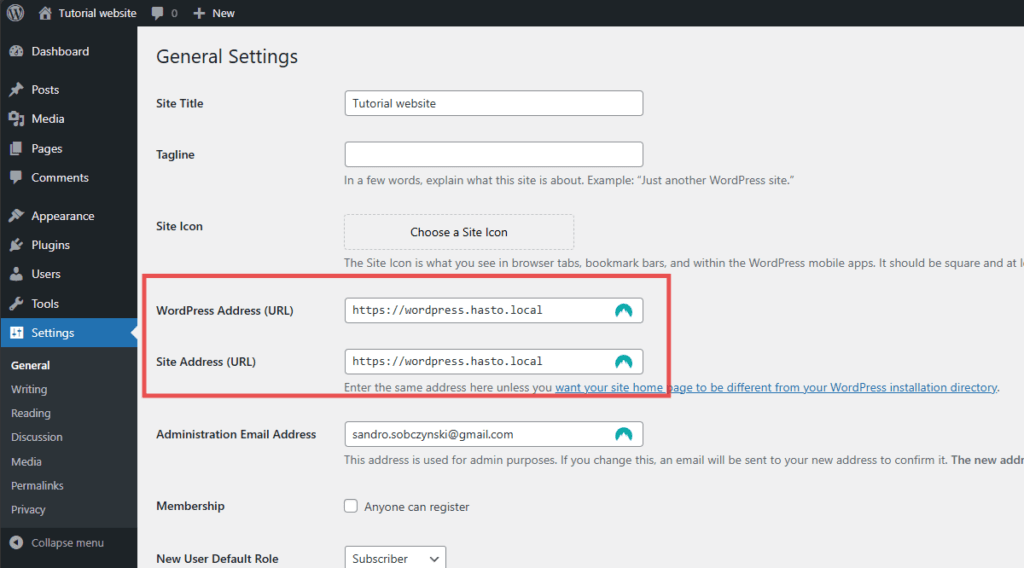
To force HTTPS on our domain, go to WordPress and change the site URL to one with https. 🗝️
After making this change, your site may stop working. To fix it, we need to access the command line and enter the following commands.
docker exec -it <WORDPRESS_CONTAINER_NAME> /bin/bash
apt update && apt install nano
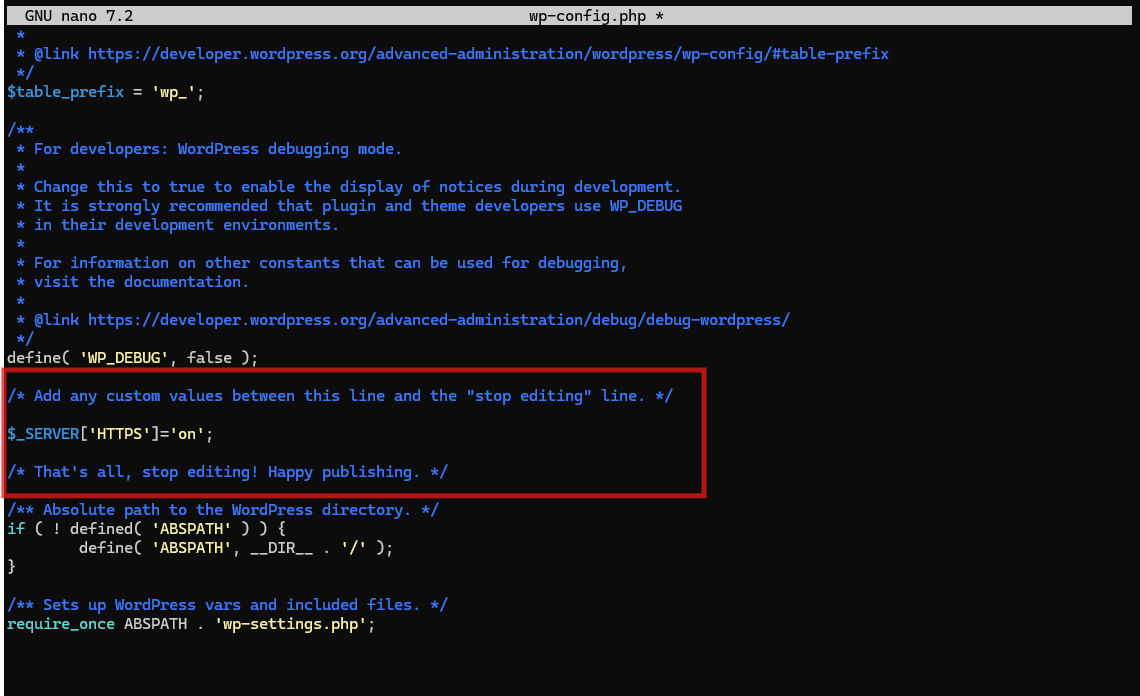
nano wp-config.phpWe need to add $_SERVER['HTTPS']='on'; in specific section of the file
Finally, to exit nano, press CTRL+X, then Y, hit Enter and that’s it!🎉
Managing WordPress Files
Sometimes you may need to upload, modify, or download a file located in your WordPress site directory. 📂
Method one is simply install the WordPress plugin WP File Manager and access the files from the WordPress admin panel.
Method two is a connection via SSH to your VPS and accessing the files from /var/wordpress-sites
Managing the MySQL Database with phpMyAdmin
A similar situation applies to the database. Sometimes it’s useful to access it in a user-friendly way.
phpMyAdmin
If you’d like to use phpMyAdmin, you can simply add a new resource in Coolify called “phpMyAdmin“ 🪪
Next, just like before, select Connect To Predefined Network and configure an appropriate (and different) domain.
However, it’s important to note that this can pose a security risk. phpMyAdmin exposed to the internet can become a target for unauthorized access or bots attempting to log into your database.
If you need to use this solution, ensure that the phpMyAdmin resource remains turned off by default and only activate it when necessary. This precaution minimizes potential vulnerabilities and helps protect your data.
SSH port tunneling (preffered)
My favorite method is SSH tunneling.
It works by connecting to our database using a program installed on our system (e.g., dbBeaver).
The process looks like this: first, we open an SSH connection using the appropriate command. Then, SSH tunnels port 3306 from the VPS server to our local port (e.g., on Windows). After that, we connect to the database in dbBeaver via localhost:3306.
Attention! If you want to use this solution, I strongly insist — actually, I command you — to block port 3306 at the firewall level of your VPS provider (e.g., in the Hetzner panel).
In the next step, we will “open” port 3306 in Coolify, so without a firewall block, your database can be accessible “from the world” — which is exactly what we don’t want!
So, if you’ve already blocked port 3306 in the firewall, go to Coolify, open the MySQL resource, and in the “Port mappings” field, enter: 3306:3306. Now restart the service.
Now, the only thing left is to open an SSH connection to your server from your local system (e.g., Windows) with the -L parameter:
ssh -L 3306:localhost:3306 [email protected]And that’s it! You can now open dbBeaver and log in as root to the database at localhost:3306 (you’ll find the password in the Coolify panel).
Wrapping Up
By following this guide, you’ve successfully set up WordPress with a separate MySQL database on Coolify. Along the way, we configured HTTPS, enabled easy file management, and discussed methods of convenient database access. 🔥
Separating WordPress and MySQL into individual resources not only enhances flexibility but also unlocks additional features like automated backups, helping safeguard your data. This approach aligns with best practices for modern deployments, promoting maintainability and long-term stability.
As you continue to develop your WordPress site, remember to periodically back up your resources, monitor for updates, and disable phpMyAdmin when not in use to minimize exposure to potential threats.
With your site now live and properly configured, you’re ready to focus on building and growing your online presence. 🎉
[2025-07] But that’s not all!
In the next article, we’ll focus on fully optimizing our hosting setup.
If you’re aiming for a 99% score in GTMetrix/PageSpeed and want to boost your SEO, make sure to stay tuned.
We’ll soon switch our backend to LiteSpeed and configure the LiteSpeed Cache plugin. 🔥
PS: If you want to configure S3 backups in your Coolify instance, check my another article ➡️ How to Set Up S3 Hosting on Your Own Server – hasto



Great one. I had no idea I was making it all wrong
Hola, escribo desde Perú, me gustó tu artículo, y me fue de ayuda. Vi que algunas cosas las haces desde la terminal pero es posible hacerlo desde la interfaz de Coolify; en fin, mi consulta es: ¿Qué servicio usas para SMTP y como lo configuras correctamente con WordPress?