Introduction
In this guide, I will show you how to easily and affordably create S3 hosting on your own server. 🖥️
We will use the MinIO application on a VPS, and while you can choose any provider that suits your needs (such as Hetzner, AWS, Azure, or OVH),
I personally will use a low-cost 1GB RAM Ubuntu VPS from mikr.us.
With an additional hard drive, my total cost will be 110 PLN per year (approximately $26.5)
[Bonus 2025-06]: Deploying CrowdSec for intelligent threat detection and prevention
VPS Hardening
Before diving into the tutorial, I recommend performing an initial configuration of your new VPS. This includes setting up an 2x A records in your DNS zone (ex. s3.contoso.com and *.s3.contoso.com), configuring a root password, creating a new user, and disabling password-based SSH login. This process, known as VPS Hardening 🪪, significantly enhances your server’s security. There are numerous resources online covering this topic, so I encourage you to do some research.
Let’s get started. 🔥
Creating a Dedicated User and Group for MinIO
To enhance security and ensure proper isolation of services, we will create a dedicated user and group specifically for running MinIO. This prevents the application from operating under the root user, reducing potential risks. 🛂
Start by executing the following commands on your Ubuntu server:
sudo groupadd minio
sudo useradd -r -g minio -s /usr/sbin/nologin minioThis user will later be responsible for running the MinIO service, ensuring that it operates with minimal privileges, adhering to best security practices.
Creating a Storage Directory for MinIO and Setting Permissions
Next, we need to create a dedicated storage directory for MinIO and assign the correct permissions to ensure the minio user has full control over it. This will serve as the location where MinIO stores data. 📂
Run the following commands on your Ubuntu server:
sudo mkdir -p /storage/minio
sudo chown minio:minio /storage/minio
sudo chmod 750 /storage/minioSetting Up MinIO Storage and Downloading the MinIO Binary
Now that we have created the storage directory for MinIO, the next step is to create a data folder inside it and download the MinIO binary. This prepares the environment for running the MinIO service. ☁️
Follow these commands to proceed:
sudo mkdir -p /storage/minio/data
cd /storage/minio
sudo wget https://dl.min.io/server/minio/release/linux-amd64/minio
sudo chown -R minio:minio /storage/minio
sudo chmod 750 /storage/minio
sudo chmod +x /storage/minio/minio
sudo chown -R minio:minio /storage/minio/data
sudo chmod u+rxw /storage/minio/dataCreating and Configuring a Systemd Service for MinIO
To ensure MinIO starts automatically and runs as a managed service, we will create a new systemd service. This service will launch MinIO with the necessary environment variables for API, CLI, and web console access. 🛠️
Step 1: Create the Systemd Service File
First, run the following command: sudo nano /etc/systemd/system/minio.serviceand add the following configuration to the file: (replace pass and domain!)
[Unit]
Description=MinIO Object Storage
After=network.target

[Service]
User=minio
Group=minio
ExecStart=/storage/minio/minio server /storage/minio/data \
  --address :9000 \
  --console-address :40288
Environment="MINIO_ROOT_USER=admin"
Environment="MINIO_ROOT_PASSWORD=strongpassword123"
Environment="MINIO_DOMAIN=<DOMAIN>"
Restart=always
LimitNOFILE=65536

[Install]
WantedBy=multi-user.targetExecStart – Runs MinIO with the specified storage path and binds the API/CLI to port 9000 and the web console to 40288. In my case I use TCP ports requested in mikr.us dashboardEnvironment – Defines the root user and password for MinIO. Replace admin and strongpassword123 with secure credentials. Dont forget about domain!Restart=always – Ensures MinIO restarts if it crashes or the server reboots.
Step 2: Enable and Start the MinIO Service ▶️
Save and exit the file, then reload the systemd daemon to apply the changes:
sudo systemctl daemon-reload
sudo systemctl enable minio
sudo systemctl start minioStep 3: Verify the Service Status and Logs 🔍
To confirm that MinIO is running correctly, check its status and view the logs:
sudo systemctl status minio
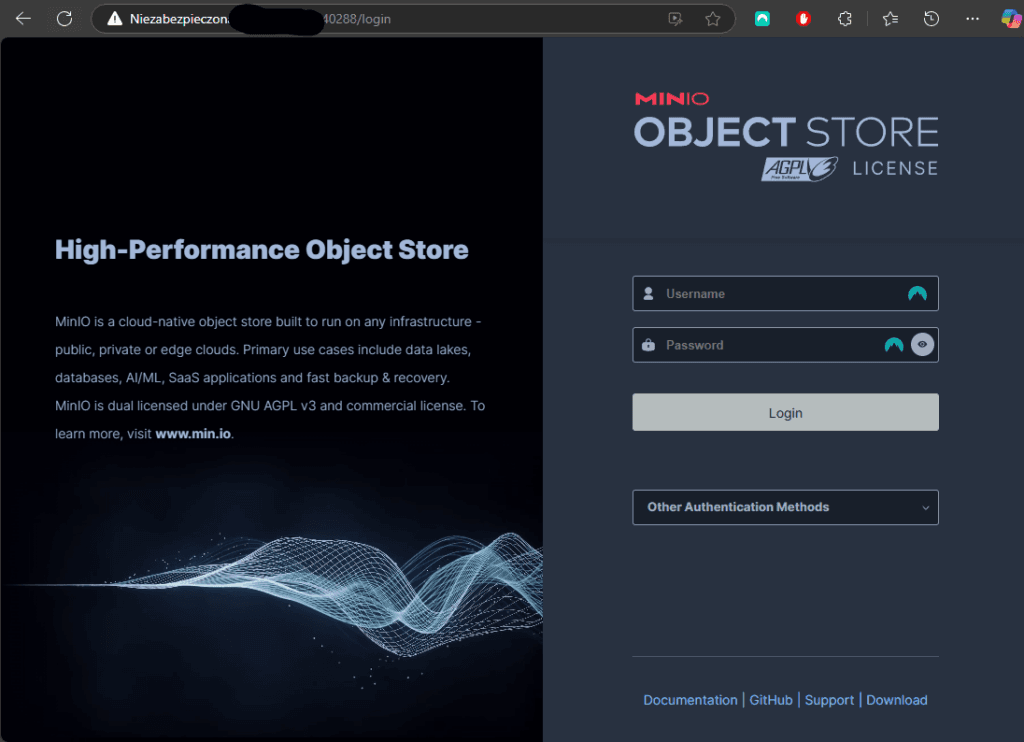
sudo journalctl -u minioAt this point, MinIO should be accessible via the API at http://<your-server-ip>:9000 and through the web console at http://<your-server-ip>:44935.
Creating a Bucket and Access Key
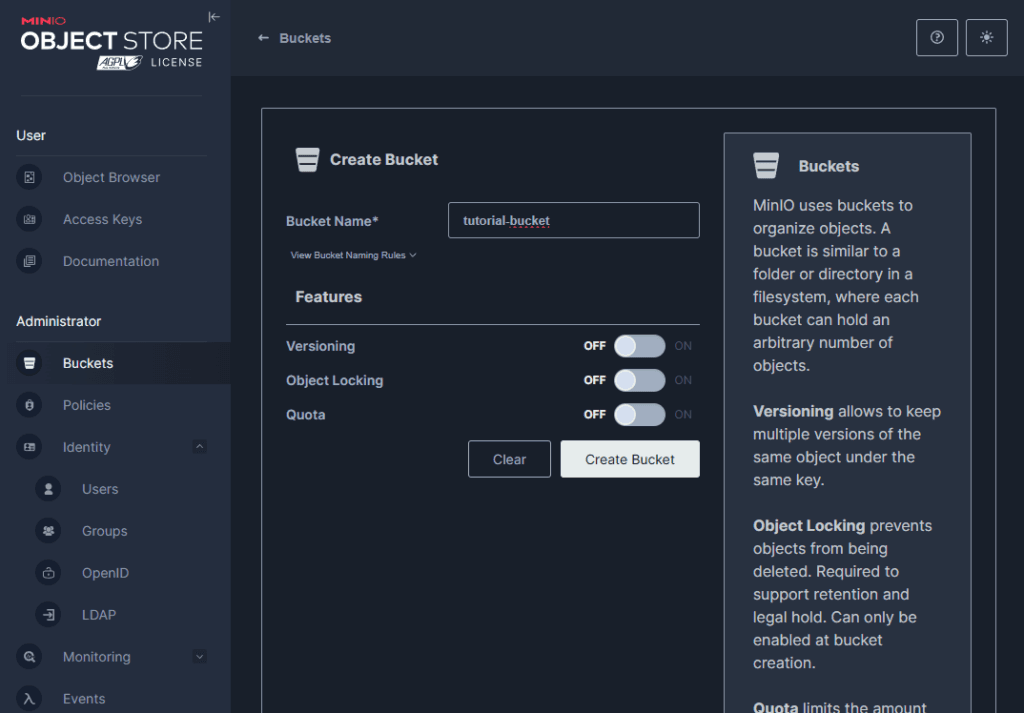
The last step is to create a bucket and generate an access key for it. Let’s navigate to the “Buckets” panel and click on “Create Bucket”. I will name my bucket tutorial-bucket. 🪣
[2025-06-24] Warning!
Unfortunately, the MinIO team in one of their recent updates decided to… remove almost all Web UI panel functionalities to motivate people to switch to the paid version for… wait for it, $100k yearly.
The next tutorial steps that take place in the Web UI will need to be performed via CLI. To do this, download the mc program on your local computer (not on the VPS server!):
MinIO Admin Client — MinIO Object Storage for Linux
Then log in to the MinIO server using:.\mc.exe alias set minio https://<DOMAIN>:9000 admin 'strongpassword123'
Finally, you will be able to steer MinIO with commands and finish this article:.\mc.exe admin info minio.\mc.exe mb minio/my-new-bucket.\mc.exe admin accesskey create minio.\mc.exe admin accesskey ls minio.\mc.exe admin accesskey edit minio YOU-ACCESS-KEY-ADBCS5-643263 --policy=./policy.json
Adding/removing buckets and access keys will need to be done via CLI (mc program) with help from the documentation -> mc admin config — MinIO Object Storage for Linux
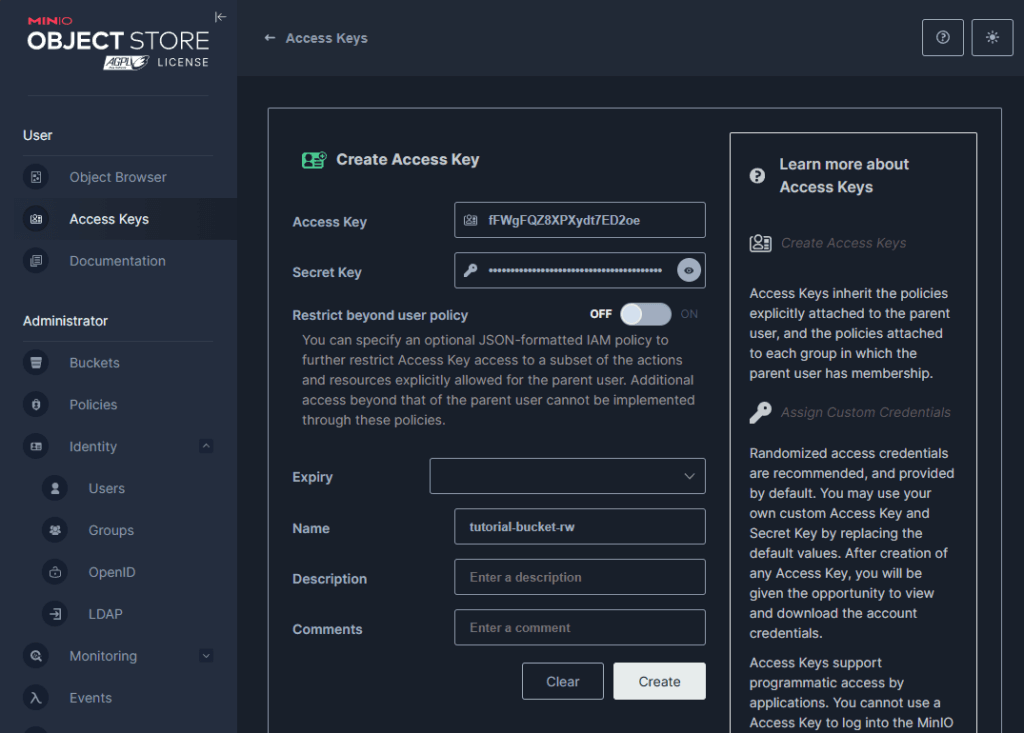
Now let’s create a new access key. Open the “Access Keys” panel and click “Create Access Key”. I will name it tutorial-bucket-rw, indicating that this key has read and write permissions for the tutorial-bucket. 🔑
Make sure to save the secret somewhere safe, as you won’t be able to view it again later.
The final step in the configuration process is to assign the appropriate permissions to our access key. 🛂
Click the pencil icon next to your new Access Key and paste the following text into the Access Key Policy field:
{
 "Version": "2012-10-17",
 "Statement": [
  {
   "Effect": "Allow",
   "Action": [
    "s3:DeleteObject",
    "s3:GetObject",
    "s3:ListBucket",
    "s3:PutObject"
   ],
   "Resource": [
    "arn:aws:s3:::tutorial-bucket/*"
   ]
  }
 ]
}This policy grants the key permissions to list, read, write, and delete objects within the tutorial-bucket, ensuring it has full access to manage the contents.
For testing purposes, I configured one of the WordPress plugins to upload a backup to our new S3 bucket. As you can see, I entered our credentials and also disabled SSL verification in the plugin settings.
Everything is working correctly. ✅
Free bonus content!
If you want to get my script for automatically patching such a MinIO server for free, sign up for my newsletter!
I wrote this script to make it quick and just one click away. After signing up, you’ll receive a link to the bonus section of my articles.
Thanks!
Configuring SSL for MinIO with Certbot and Automated Certificate Synchronization
To ensure basic security standards, we need to configure SSL for our MinIO instance 🛜. We’ll achieve this by using Certbot and creating a hook that automatically synchronizes certificates to the appropriate directory.
Step 1: Synchronizing certificates 🛠️
We can proceed with creating a hook which will synchronize SSL certificates after every certbot execution.
Create a new directory with the following commands:
sudo mkdir -p /home/minio/.minio/certs
sudo chown -R minio:minio /home/minio
sudo chmod u+rxw -R /home/minioNext, create a script file at sudo nano /etc/letsencrypt/renewal-hooks/deploy/minio-sync.sh
#!/bin/bash

DOMAIN="<YOUR_DOMAIN>"

CERT_SRC="/etc/letsencrypt/live/$DOMAIN/fullchain.pem"
KEY_SRC="/etc/letsencrypt/live/$DOMAIN/privkey.pem"

CERT_DST="/home/minio/.minio/certs/public.crt"
KEY_DST="/home/minio/.minio/certs/private.key"

mkdir -p "$(dirname "$CERT_DST")"
cp "$CERT_SRC" "$CERT_DST"
cp "$KEY_SRC" "$KEY_DST"

chmod 600 "$KEY_DST"
chmod 644 "$CERT_DST"
chown -R minio:minio "$KEY_DST"
chown -R minio:minio "$CERT_DST"

systemctl restart minioNow, grant execution permissions to the script via sudo chmod +x /etc/letsencrypt/renewal-hooks/deploy/minio-sync.sh
Step 2: Running Certbot
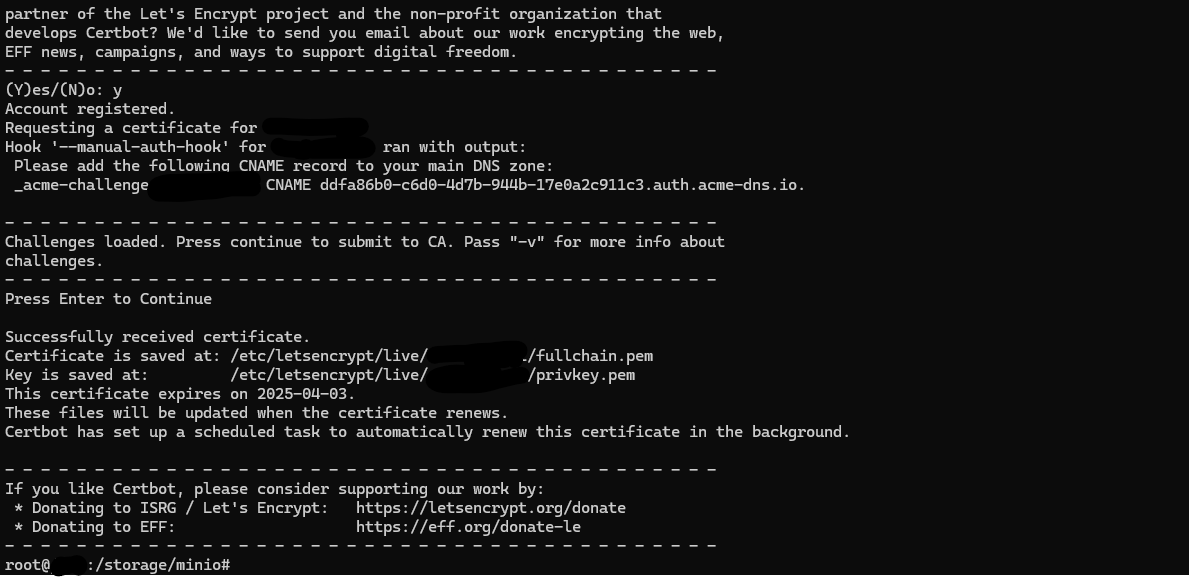
You need to configure Certbot. I won’t duplicate commonly available information, so simply follow the guide below to complete the setup:
🔗 How to Acquire a Let’s Encrypt Certificate Using DNS Validation with ACME-DNS and Certbot on Ubuntu 18.04
After running the command:
sudo certbot certonly --manual --manual-auth-hook /etc/letsencrypt/acme-dns-auth.py --preferred-challenges dns --debug-challenges -d <YOUR_DOMAIN> -d *.<YOUR_DOMAIN>The certificates privkey.pem and cert.pem will be generated in the directory: /etc/letsencrypt/live/<YOUR_DOMAIN>/
Now, when we execute the command: systemctl restart minio. We should notice that the red padlock in the browser disappears, indicating that our connection is now secure and encrypted using TLS. 🎉🚀
Warning! The below command will generate an SSL certificate only once. Unfortunately, it will expire after 3 months and HTTPS will stop working.
To prevent this, you can use a different type of authentication — for example, Cloudflare. For this, you need to replace
--manual --manual-auth-hook --preferred-challenges dns --debug-challenges
with --dns-cloudflare --dns-cloudflare-credentials ~/.secrets/certbot/cloudflare.ini.
Before, you need to generate a token here using the “Edit zone DNS” template and save it like this:echo "<TOKEN>" > ~/.secrets/certbot/cloudflare.ini .
Also you need to install cloudflare plugin: apt remove certbot -y && apt install snapd -y && snap set certbot trust-plugin-with-root=ok && snap install certbot && snap install certbot-dns-cloudflare
Wrapping Up
Congratulations! You’ve successfully set up a secure and cost-effective S3-compatible storage solution using MinIO. From configuring a VPS to enabling SSL encryption. With your MinIO instance ready, you can now confidently use it for backups, media storage, or any other cloud storage needs.
Happy hosting! 🔥
[Bonus 2025-06] Enhanced Security with CrowdSec Integration (optional)
While our MinIO setup is functional and secured with SSL certificates, we can significantly improve its security posture by implementing CrowdSec – a collaborative security engine that provides real-time protection against malicious activities. 🛡️
CrowdSec acts as a modern intrusion detection and prevention system that analyzes log patterns to identify suspicious behavior and automatically blocks malicious actors. Unlike traditional solutions, CrowdSec leverages collective intelligence from its community, sharing threat data to protect all users from emerging attacks. This makes it particularly valuable for protecting cloud storage services like our MinIO instance, which are frequent targets for unauthorized access attempts, brute force attacks, and data exfiltration attempts.
To integrate CrowdSec with our MinIO setup, we’ll need to implement several architectural changes that will create a more robust and secure infrastructure:
- Port Reconfiguration: Modify MinIO to run on an internal port (9001) instead of the public-facing port (9000)
- Reverse Proxy Setup: Install and configure Nginx as a reverse proxy to handle external connections
- SSL Certificate Migration: Transfer SSL certificate handling from MinIO to Nginx for better security management
- Service Cleanup: Disable the automated certificate synchronization service as it will no longer be needed
- CrowdSec Installation: Deploy CrowdSec with Nginx collection and firewall bouncer for comprehensive protection
Let’s implement these changes step by step.
Step 1: Reconfiguring MinIO Port
First, we need to modify our MinIO service to run on an internal port. Edit the systemd service file:
sudo nano /etc/systemd/system/minio.serviceChange the --address parameter from :9000 to :9001 in the ExecStart line:
ExecStart=/storage/minio/minio server /storage/minio/data \
  --address :9001 \
--console-address :40288Then restart the MinIO service:
sudo systemctl daemon-reload
sudo systemctl restart minioStep 2: Installing and Configuring Nginx
Install Nginx to act as our reverse proxy:
sudo apt update
sudo apt install nginx -yCreate a new Nginx configuration file for MinIO:
sudo nano /etc/nginx/sites-available/minioAdd the following configuration (replace <DOMAIN> with your actual domain):
server {
listen 9000 ssl;
server_name <DOMAIN> *.<DOMAIN>;
ssl_certificate /etc/letsencrypt/live/<DOMAIN>/fullchain.pem;
ssl_certificate_key /etc/letsencrypt/live/<DOMAIN>/privkey.pem;
# Enhanced SSL configuration
ssl_protocols TLSv1.2 TLSv1.3;
ssl_ciphers ECDHE-RSA-AES256-GCM-SHA512:DHE-RSA-AES256-GCM-SHA512:ECDHE-RSA-AES256-GCM-SHA384:DHE-RSA-AES256-GCM-SHA384;
ssl_prefer_server_ciphers off;
ssl_session_cache shared:SSL:10m;
# Logging for CrowdSec analysis
access_log /var/log/nginx/minio-access.log;
error_log /var/log/nginx/minio-error.log;
# MinIO requires special handling for large file uploads
client_max_body_size 1000M;
proxy_request_buffering off;
location / {
proxy_pass http://127.0.0.1:9001;
proxy_set_header Host $http_host;
proxy_set_header X-Forwarded-Host $http_host;
proxy_set_header X-Real-IP $remote_addr;
proxy_set_header X-Forwarded-For $proxy_add_x_forwarded_for;
proxy_set_header X-Forwarded-Proto https;
proxy_set_header X-Forwarded-Port 9000;
proxy_buffering off;
proxy_connect_timeout 300;
proxy_send_timeout 300;
proxy_read_timeout 300;
}
}Important note for Cloudflare users:
If you’re using Cloudflare and have enabled the “Proxy” option for your DNS records, things get a bit more complicated. Instead of receiving the actual user’s IP address, our server will get a Cloudflare IP. As a result, CrowdSec traffic analysis or blocking traffic via bouncers (e.g., nftables) might not work correctly.
Therefore, if you’re using Cloudflare with proxy enabled, it’s recommended to add the following snippet, and instead of using the nftables bouncer, use the cloudflare bouncer.
(...)
# Retreiving real IP from Cloudflare (ipv4)
set_real_ip_from 173.245.48.0/20;
set_real_ip_from 103.21.244.0/22;
set_real_ip_from 103.22.200.0/22;
set_real_ip_from 103.31.4.0/22;
set_real_ip_from 141.101.64.0/18;
set_real_ip_from 108.162.192.0/18;
set_real_ip_from 190.93.240.0/20;
set_real_ip_from 188.114.96.0/20;
set_real_ip_from 197.234.240.0/22;
set_real_ip_from 198.41.128.0/17;
set_real_ip_from 162.158.0.0/15;
set_real_ip_from 104.16.0.0/13;
set_real_ip_from 104.24.0.0/14;
set_real_ip_from 172.64.0.0/13;
set_real_ip_from 131.0.72.0/22;
# Retreiving real IP from Cloudflare (ipv6)
set_real_ip_from 2400:cb00::/32;
set_real_ip_from 2606:4700::/32;
set_real_ip_from 2803:f800::/32;
set_real_ip_from 2405:b500::/32;
set_real_ip_from 2405:8100::/32;
set_real_ip_from 2c0f:f248::/32;
set_real_ip_from 2a06:98c0::/29;
# Retreiving real IP from Cloudflare
real_ip_header CF-Connecting-IP;
real_ip_recursive on;
location / {
(...)Enable the site and test the configuration:
sudo ln -s /etc/nginx/sites-available/minio /etc/nginx/sites-enabled/minio
sudo nginx -t
sudo systemctl enable nginx
sudo systemctl start nginxStep 3: Changing Certificate Synchronization
Since Nginx now handles SSL certificates directly, we can remove the MinIO certificate synchronization hook and create simpler one which will only restart the nginx
sudo rm -rf /etc/letsencrypt/renewal-hooks/deploy/minio-sync.sh
sudo rm -rf /home/minio/.minio/certs
echo -e '#!/bin/bash\nsystemctl reload nginx' | sudo tee /etc/letsencrypt/renewal-hooks/post/reload-nginx.sh > /dev/null && sudo chmod +x /etc/letsencrypt/renewal-hooks/post/reload-nginx.sh
sudo systemctl restart minioStep 4: Installing and Configuring CrowdSec
Install CrowdSec using the official installation script:
curl -s https://install.crowdsec.net | sudo bash
sudo apt install crowdsec -yEnroll in CrowdSec Console (Optional but Recommended)
To benefit from the collective intelligence and have access to advanced features, enroll your instance:
sudo cscli console enroll -e context <YOUR_ENROLLMENT_KEY>You can obtain your enrollment key from the CrowdSec Console.
Install Nginx Collection
Install the Nginx collection to enable CrowdSec to understand and analyze Nginx logs:
sudo cscli collections install crowdsecurity/nginxConfigure Log Sources
Edit the CrowdSec acquisition configuration to monitor our Nginx logs:
sudo nano /etc/crowdsec/acquis.yamlEnsure the following configuration is present:
filenames:
- /var/log/nginx/minio-access.log
- /var/log/nginx/minio-error.log
- /var/log/nginx/access.log
- /var/log/nginx/error.log
labels:
type: nginxInstall Firewall Bouncer
Install the nftables bouncer to automatically block detected malicious IPs:
sudo apt install crowdsec-firewall-bouncer-nftables -yRestart Services
Restart CrowdSec to apply all configurations:
sudo systemctl restart crowdsec
sudo systemctl restart crowdsec-firewall-bouncerStep 5: Additional Security Hardening
Whitelist Trusted IPs
Add your server’s IP and any trusted servers to CrowdSec’s whitelist:
sudo cscli decisions add --ip <YOUR_TRUSTED_IP> --duration 0 --type ban --reason "Trusted server"Optional: Disable MinIO Web Console
Since the MinIO web console has limited functionality in recent versions, you may choose to disable it entirely. Edit the systemd service file:
sudo nano /etc/systemd/system/minio.serviceRemove the --console-address parameter, leaving only:
ExecStart=/storage/minio/minio server /storage/minio/data \
--address :9001Then restart the service:
sudo systemctl daemon-reload
sudo systemctl restart minioMonitoring and Verification
To verify that CrowdSec is working correctly, you can:
- Check CrowdSec status:
sudo cscli metrics- View active decisions (blocked IPs):
sudo cscli decisions list- Open MinIO in separate device (ex. your smartphone), check his IP address and try to block it
# Check device traffic (IP address)
tail -f /var/log/nginx/minio-access.log

# Ban
cscli decisions add --ip 1.23.45.67 -d 5mCheck out also this tutorial Securing Coolify with CrowdSec: A Complete Guide | hasto, to check how to integrate Discord notifications with your CrowdSec instance!
Your MinIO instance is now protected by CrowdSec’s intelligent threat detection and automatic blocking capabilities. The system will continuously monitor access patterns and block suspicious activities, significantly enhancing the security of your S3-compatible storage solution. 🚀




Pingback: Installing and Configuring WordPress with MySQL on Coolify – hasto
Pingback: Installing Elasticsearch and Kibana on VPS - hasto.pl